LED Dimming Compatibility: What Works, What Flickers, and What Kills Drivers
The client rang back three days after the LED downlight install. The lights flicker when dimmed below 50%. They glow faintly when switched off. And the third fitting in the hallway stopped working entirely after a week. New LEDs, same old dimmer. That is the source of more LED callback jobs than anything else in commercial and residential fitouts.
This article covers the full picture: why LEDs are fundamentally incompatible with the dimmers most Australian buildings still have, what trailing-edge and leading-edge actually mean in practice, the flicker and ghosting mechanisms, and what to specify so the job stays done.
Why LEDs and old dimmers fight
An incandescent globe is a resistive load. Current flows through a tungsten filament. The filament heats up and glows. You can chop the AC waveform however you like and the filament responds smoothly and predictably. The dimmer was designed for this.
An LED is not a resistive load. It is driven by a switch-mode power supply (the driver) that actively regulates current to the LED chips. The driver looks like a capacitive load to the dimmer. It draws current in a different shape, at a different time in the cycle, than the dimmer expects. The result is instability, interference, noise and in the worst case a driver that fries itself trying to stabilise against a dimmer that keeps pulling the rug out.
Add to this that LEDs draw 60–90% less wattage than the fittings they replaced. A dimmer designed to handle a minimum load of 40W stops functioning correctly when the total load is six 8W downlights. The dimmer's own electronics cannot maintain stable operation below the minimum load threshold, and the LEDs bear the consequences.
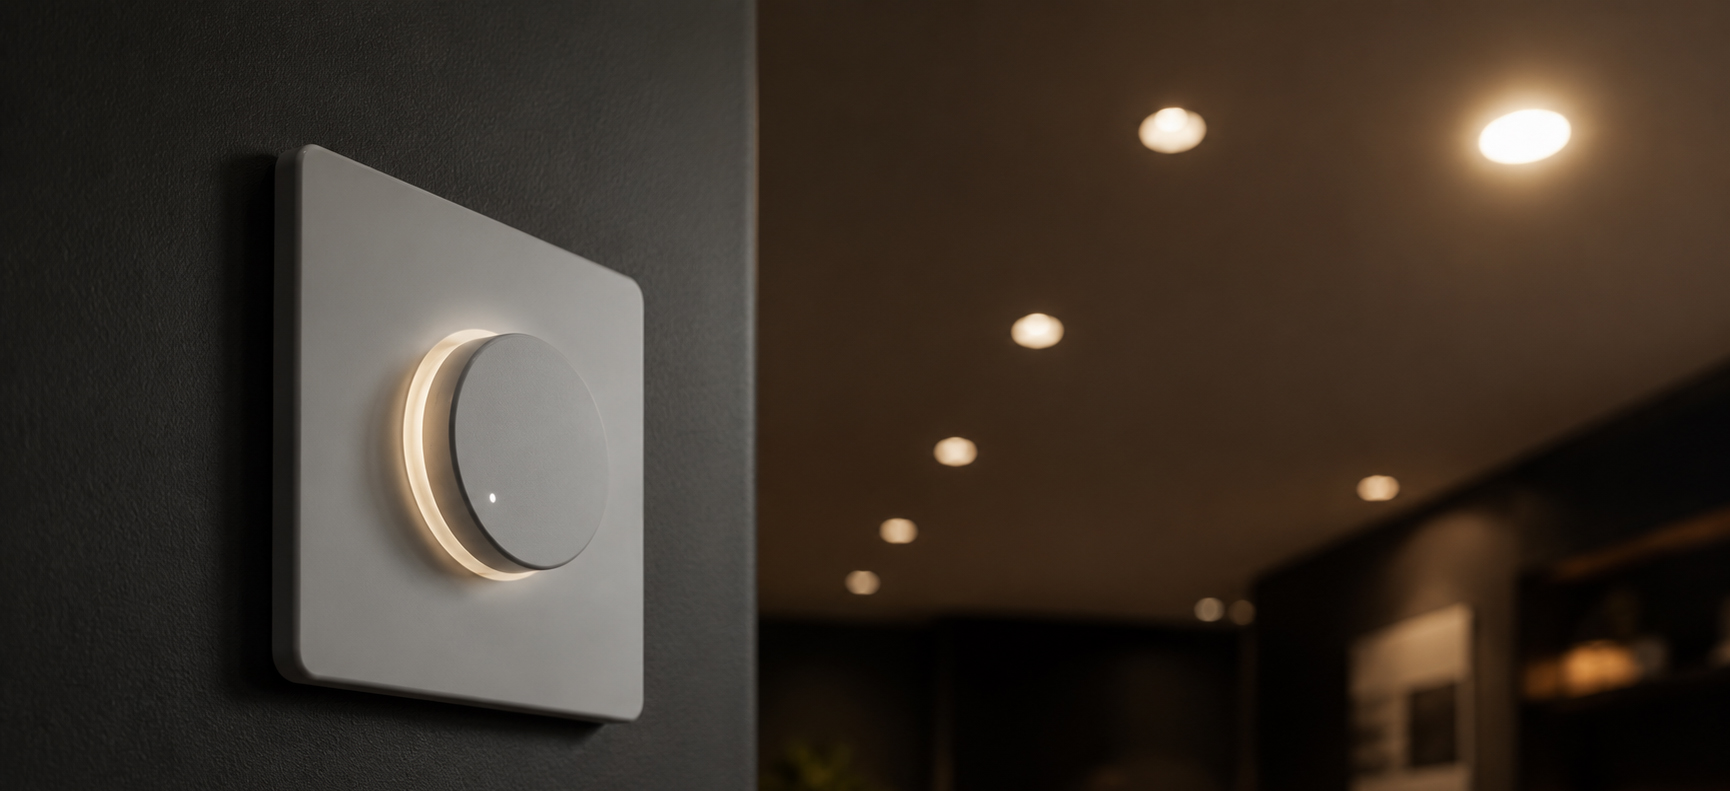
Leading-edge vs trailing-edge: the actual difference
Both types of phase-cut dimmer work by removing part of each AC half-cycle. Less waveform = less average power = lower light output. The difference is which part of the cycle they cut.
Forward-phase cut
- Cuts the beginning of each half-cycle
- Fires abruptly at a set point in the wave
- High inrush current at trigger point
- Designed for resistive (incandescent) and inductive (magnetic transformer) loads
- The default in most Australian homes pre-2015
- Brands: most Clipsal, HPM, PDL legacy range
- Causes buzzing, flicker, dropout with LED drivers
- Risk of driver failure on capacitive LED loads
Reverse-phase cut
- Cuts the end of each half-cycle
- Soft ramp-up, no inrush spike
- Low electromagnetic interference
- Designed for capacitive loads: LED drivers, electronic transformers
- Better minimum load tolerance (often as low as 5–10W)
- Brands: Clipsal C-Bus TE modules, Legrand Synergys, Lutron Caséta
- Smooth dimming curve from 1–100% with compatible drivers
- Costs more but eliminates most compatibility callbacks
The practical takeaway: if you are installing dimmable LEDs and the dimmer is more than five years old, replace the dimmer. Asking a leading-edge TRIAC to play nice with a modern LED driver is possible in some combinations, but you are relying on luck rather than engineering.
⚠ Not all "dimmable" LEDs work with all dimmers. A fitting marked "dimmable" means it has a dimmable driver. It does not mean it works with every dimmer on the market. The compatibility list in the driver datasheet is the only reliable guide. If there is no compatibility list, ask the manufacturer or choose a different product.
Flicker: visible and invisible
Australian mains runs at 50Hz. A phase-cut dimmer fires twice per cycle, producing 100 flicker events per second. At 100Hz, most people cannot consciously see the flicker, but it has measurable effects: eye strain, headaches and reduced visual comfort in sustained work environments.
Get below about 50% on a poorly matched dimmer, and the driver can no longer maintain smooth current output. The flicker drops into the 20–50Hz range, which is visible to the naked eye. This is the "flickering when dimmed low" complaint that comes up constantly after LED retrofits with unchanged dimmers.
How flicker is measured
Percent flicker = (800 − 200) ÷ (800 + 200) × 100 = 60% flicker (unacceptable)
Target: Below 3% flicker for office and commercial environments (CIBSE guidance)
Below 8% for general occupied spaces
Quality dimmable LED drivers: typically <1% at full output, <5% across the dim range
Flicker also has a workplace safety dimension. In manufacturing environments with rotating or reciprocating machinery, high-flicker lighting at certain frequencies can cause the stroboscopic effect: a spinning shaft that appears stationary. This is a genuine hazard. AS/NZS 1680.2.4 (industrial tasks) addresses this, and it is one reason fluorescent lighting was phased out of many Australian production environments before LED was ready.
⚠ Stroboscopic risk: If your facility has motors, lathes, grinders, conveyors or any rotating equipment, visible flicker from mismatched dimmers is a safety issue, not just an aesthetic one. Specify flicker-free drivers or fixed-output fittings in production zones.
What causes flicker in a matched installation
Even with a trailing-edge dimmer and a dimmable driver, flicker can occur at the bottom of the dim range. This happens because LED drivers have a minimum dim threshold, typically 5–15% of full output. Below that threshold, the driver either drops out entirely (the light turns off) or loses regulation and flickers. The dimmer continues sending a smaller phase-cut signal; the driver cannot follow it.
High-quality commercial drivers specify their minimum dim point. A driver rated to 1% minimum dim (common in DALI-controlled systems) eliminates nearly all of this. Budget dimmable drivers rated to 10% minimum dim create a dead zone where the knob is turned down but the light is already off.
Ghosting: why LEDs glow when switched off
Ghosting is the dim glow visible in an LED fitting when the dimmer or switch is in the off position. It looks like the fitting is not quite turning off. It is not a faulty fitting. It is a circuit problem.
Cause 1: current leakage through the dimmer
A 2-wire dimmer (no neutral wire) powers its own electronics by passing a small amount of current through the load, even when "off". With an incandescent globe, this micro-current is negligible, the filament does not heat up and there is no visible glow. With an LED driver, even a few milliamps is enough to partially charge the driver's input capacitors and produce a faint glow. This is the most common cause of ghosting in Australian LED retrofits, because most Australian dimmer installations are 2-wire.
Cause 2: 2-way and multi-way switching circuits
In a 2-way or 3-way switching arrangement (two switches controlling the same light, typical in hallways and stairwells), the wiring creates a path for induced current even when both switches are nominally off. LEDs detect this. Incandescents ignored it. The result is ghosting that appears and disappears depending on switch position.
Cause 3: capacitive wiring
Long cable runs develop capacitive coupling between active and neutral conductors. In older buildings with original wiring, this can be enough to partially energise LED drivers. It becomes more pronounced with higher-efficiency (higher-impedance) modern drivers.
Fixing ghosting
There are three practical fixes, in order of preference:
- Replace the dimmer with a 3-wire (neutral) trailing-edge unit. A 3-wire dimmer does not need to leak current through the load to power itself. No leakage means no glow. This requires a neutral wire at the switch position, which older Australian loop-at-fitting wiring does not provide. If the neutral is not there, run a new feed or use one of the options below.
- Install a load bypass module. Clipsal sells the MS-Load (10W resistive bypass), Legrand has similar products. The module provides the dimmer a small resistive load to reference against, eliminating both ghosting and minimum-load issues. It wastes around 10W continuously, which is a trade-off against rewiring cost.
- Use a ghost-suppressor filter. Small passive filters (around $15–30) wire in parallel with the LED fitting and bleed off the micro-current before it reaches the driver. They work for mild ghosting. They do not solve systematic minimum-load problems or severe circuit leakage.
Dimming protocols: beyond the phase-cut dimmer
Phase-cut dimmers (leading or trailing-edge) are one way to dim LEDs. In commercial environments, they are often not the best way. Three alternative protocols deliver better results for different applications.
0–10V Analogue
- Separate low-voltage control signal (0V to 10V DC)
- 10V = full output; 0V = minimum dim (not off)
- Separate switched active still required to turn off
- Very reliable; works with virtually all commercial LED drivers rated for it
- Dim range typically 1–100%
- Used in warehouses, offices, industrial buildings
- Common controllers: Clipsal C-Bus, simple rotary 0–10V pots
DALI
- Digital Addressable Lighting Interface (IEC 62386)
- 2-wire digital bus, up to 64 devices per circuit
- Individual fixture addressing, group control, scene setting
- Fault reporting back to controller
- Dim range 0.1–100% on quality drivers
- Industry standard for commercial office, hospital, school fitouts
- Requires DALI-compatible driver and controller
- Higher installation cost; significant operational flexibility
PWM
- Pulse Width Modulation: switches current on/off at high frequency
- 50% duty cycle = 50% brightness
- PWM frequency matters: <1 kHz causes camera flicker
- Quality drivers use ≥10 kHz (invisible to eye and most cameras)
- Common in low-voltage LED strip, sign lighting, retail accent
- Incompatible with phase-cut mains dimmers
Casambi / Zigbee / BLE
- Wireless mesh control via Bluetooth (Casambi) or Zigbee
- No additional control wiring required
- Commissioning via phone app
- Growing in commercial retrofit where adding control wiring is impractical
- Driver must have compatible wireless module
- Relies on RF signal quality; plan for mesh coverage
For new commercial fitouts: specify DALI or 0–10V depending on the control system. For a straight LED retrofit where the dimmer is accessible, replace leading-edge with trailing-edge and confirm driver compatibility. For older buildings with inaccessible wiring, wireless (Casambi/Zigbee) removes the need to run control cables.
The minimum load problem
Every phase-cut dimmer has a minimum load specification. Below that load, the dimmer's own electronics become unstable because they were designed to draw reference current from the load. Most Australian legacy dimmers specify 40–60W minimum.
Here is the arithmetic for a typical residential or small commercial installation:
| Room configuration | Total LED load | Minimum load met? | Expected result |
|---|---|---|---|
| 6 × 10W LED downlights | 60W | Borderline | May work, likely flickers at low dim levels |
| 4 × 8W LED downlights | 32W | ✗ No | Flickering, dropout, ghosting likely |
| 10 × 9W LED downlights | 90W | ✓ Yes | More stable, still depends on driver compatibility |
| 3 × 18W LED panels | 54W | Marginal | Depends on dimmer brand and driver type |
| 8 × 36W LED troffer (office) | 288W | ✓ Yes | Load adequate; driver compatibility still matters |
The fix for minimum-load failures is either a bypass/dummy load module (adds a fixed resistive load to bring the total above the dimmer's minimum) or replacement with a trailing-edge dimmer that has a lower minimum load rating. Most trailing-edge dimmers specify 5–10W minimum, which covers almost any practical LED installation.
The five failure modes: symptoms and causes
1. Flickering at low dim levels
Symptom: Lights are stable at 70–100% but flicker visibly below 50%.
Cause: Leading-edge dimmer creating waveform the driver cannot follow at low phase angles. Or driver minimum dim threshold reached.
Fix: Replace dimmer with trailing-edge unit and confirm driver minimum dim spec. A driver rated to 5% minimum dim eliminates most low-end instability.
2. Ghosting (glow when off)
Symptom: Faint glow from fittings when switch or dimmer is in the off position.
Cause: 2-wire dimmer leaking micro-current through the load. Or 2-way switching circuit creating a leakage path.
Fix: Install a 3-wire neutral dimmer if neutral is available at the switch. Otherwise add a bypass load module (Clipsal MS-Load or equivalent) or a ghost-suppressor filter.
3. Buzzing or humming from fittings
Symptom: Audible 100Hz buzz from the fitting or the dimmer itself, especially at partial dim levels.
Cause: Driver switching frequency intermodulating with the dimmer's phase-cut frequency. More common with leading-edge dimmers and certain driver topologies.
Fix: Try a different dimmer brand (some driver/dimmer combinations are simply incompatible). Check the manufacturer's approved dimmer list. Trailing-edge dimmers generally produce less audible noise.
4. Driver failure (fitting stops working)
Symptom: Fitting works initially, then stops after days or weeks. Driver is dead. Repeat failures after replacement.
Cause: Leading-edge dimmer creating high inrush current spikes that exceed the driver's input protection. Non-dimmable driver connected to a dimmer circuit.
Fix: Replace the dimmer with a trailing-edge unit. Confirm the driver is rated for dimming. Never connect a non-dimmable driver to a dimmed circuit.
5. Flash on turn-on
Symptom: Lights briefly jump to full brightness when switched on before settling to the set dim level.
Cause: Driver capacitors charging through the initial phase-cut pulse before the dimmer achieves regulation. Common with leading-edge dimmers.
Fix: Trailing-edge dimmers ramp up smoothly and eliminate this almost entirely. Also check that the driver has a soft-start function (most quality commercial drivers do).
2-wire vs 3-wire dimmers: the Australian wiring context
Most Australian domestic and light commercial wiring uses the "loop at fitting" method. The active conductor runs from the switchboard to the fitting, then loops back through the switch. There is no neutral wire present at the switch position.
This matters because 3-wire (neutral) dimmers are significantly better for LEDs. They power their own electronics from the neutral rather than leaking current through the load. No leakage = no ghosting, no minimum-load issues, more stable control. But they need a neutral at the switch, which loop-at-fitting wiring does not provide.
For new work or when walls are open for a renovation, always run the neutral to the switch position. For retrofit work on existing loop-at-fitting circuits, the options are: 2-wire trailing-edge dimmer with bypass load module, wireless dimmer (Casambi or similar that takes its power from the active alone), or driver-level dimming (0–10V or DALI control wired at the fitting rather than the switch).
Compatibility check: before you quote a dimming job
- Confirm the LED fitting is explicitly rated as "dimmable" and has a manufacturer's approved dimmer list
- Identify whether existing dimmers are leading-edge or trailing-edge (check the spec plate or model number)
- Calculate total load on the circuit; confirm it meets or exceeds the dimmer's minimum load rating
- Confirm whether a neutral wire is present at the switch position (determines 2-wire vs 3-wire dimmer options)
- Check whether the wiring is 2-way or multi-way switched (ghosting risk)
- Confirm the dimming protocol the LED driver supports: phase-cut, 0–10V, DALI or PWM
- For commercial work: check whether the BMS or lighting control system specifies a protocol (DALI is common in new commercial builds)
- For flicker-sensitive environments (workshops, video production, healthcare): specify drivers with <3% flicker and ≥10 kHz PWM frequency
- For manufacturing with rotating equipment: specify flicker-free fixed-output fittings, not dimmed
- Document the dimmer model and driver model combination and keep it in the job file
What to specify for common Australian commercial applications
| Application | Recommended dimming type | Notes |
|---|---|---|
| Small office fitout (<20 fittings) | Trailing-edge phase-cut + dimmable LED driver | Confirm driver on dimmer's approved list; use 3-wire dimmer if neutral available |
| Open-plan commercial office | DALI or 0–10V via BMS | DALI preferred for scene control and fault reporting; 0–10V simpler and lower cost |
| Retail store | Trailing-edge + dimmable driver, or DALI for large format | Specify Ra ≥90 drivers; confirm dimmer handles mixed loads (downlights + track) |
| Warehouse (dimmable) | 0–10V with motion/daylight sensors | High-bay drivers with 0–10V inputs are standard; pairs with occupancy sensing for energy savings |
| Hospitality / restaurant | Trailing-edge with scene controller | 2700–3000K, Ra ≥90; smooth trailing-edge dimming essential for ambience |
| Residential retrofit | Trailing-edge phase-cut, replace existing LE dimmer | Add bypass load if total LED load <40W; use ghost-suppressor in 2-way circuits |
| Healthcare / aged care | DALI with tunable white capability | Circadian lighting requires CCT control (2700K–6500K) as well as dimming; DALI-2 preferred |
| Manufacturing floor | Fixed output or 0–10V; no phase-cut dimming | Flicker-free mandatory around rotating equipment; occupancy sensors preferred over dimming |
The driver datasheet is the reference document
Every reputable LED driver manufacturer publishes a compatibility list or a compatibility test report for their dimmable drivers. This document lists the specific dimmer models the driver has been tested with and the minimum/maximum load for stable operation. It is the only reliable guide to whether a combination will work.
If the driver you are quoting does not have a compatibility list, ask for one. If the supplier cannot produce it, that driver is not a suitable product for a dimmed installation. The compatibility list is not marketing material. It is test data, and the absence of it means the product has not been tested.
Common Australian dimmer brands with good LED compatibility lists include Clipsal (Saturn and ICONIC trailing-edge models), Legrand (Synergys range), HPM (DLI series), and Lutron (Caséta and Radio Ra3). Each publishes compatibility tables by driver model. Cross-reference before specifying.
One last thing worth knowing: a non-dimmable LED driver connected to a dimmed circuit is not just a performance problem. It is a fire risk. Non-dimmable drivers are not designed to handle the modified waveform from a phase-cut dimmer. They can overheat, fail prematurely, or in rare cases fail in a way that creates heat at the fitting. If there is any chance a circuit is dimmed, spec a dimmable driver.
⚡ Calculate your LED payback with Australian energy tariffs
Factor in your state electricity rate, annual operating hours and fitting count to get a real payback figure before you sign off on the spec.
Open the Calculator →